Free custom domain email

I've always wanted to have my own domain and be able to send and receive emails using it. What I don't like are monthly subscriptions.
This guide explains how I managed to set up a custom domain with my existing Gmail inbox, all without a monthly cost. The only cost is a domain if you don't already have one.
The goals:
- use your existing inbox with a custom domain,
- send and receive emails with the custom domain,
- be completely free (besides for the domain cost)
Things you need
- An existing email account, I use Gmail.
- A Cloudflare account.
- A domain name using Cloudflare as your name server and DNS. Transfer your domain to them or buy one using the Cloudflare registrar.
- An email SMTP server such as Brevo, SendGrid or another of your choice. These allow you to send between 100 and 300 emails a day for free which should be fine for personal purposes.
Enable email forwarding
The first step once you have your domain registered is to enable email forwarding. Do this within the Cloudflare admin page for your domain. After setting email forwarding up, email sent to a [email protected] is forwarded to another email address of your choice. You can also configure a 'catch all' address so that any emails sent to your domain will be forwarded to a specific inbox.
- Go to Email on the left menu bar.
- Enable email forwarding for your domain.
- Add the email DNS settings required by Cloudflare. This can be done automatically.
- Add a destination address, and verify it.
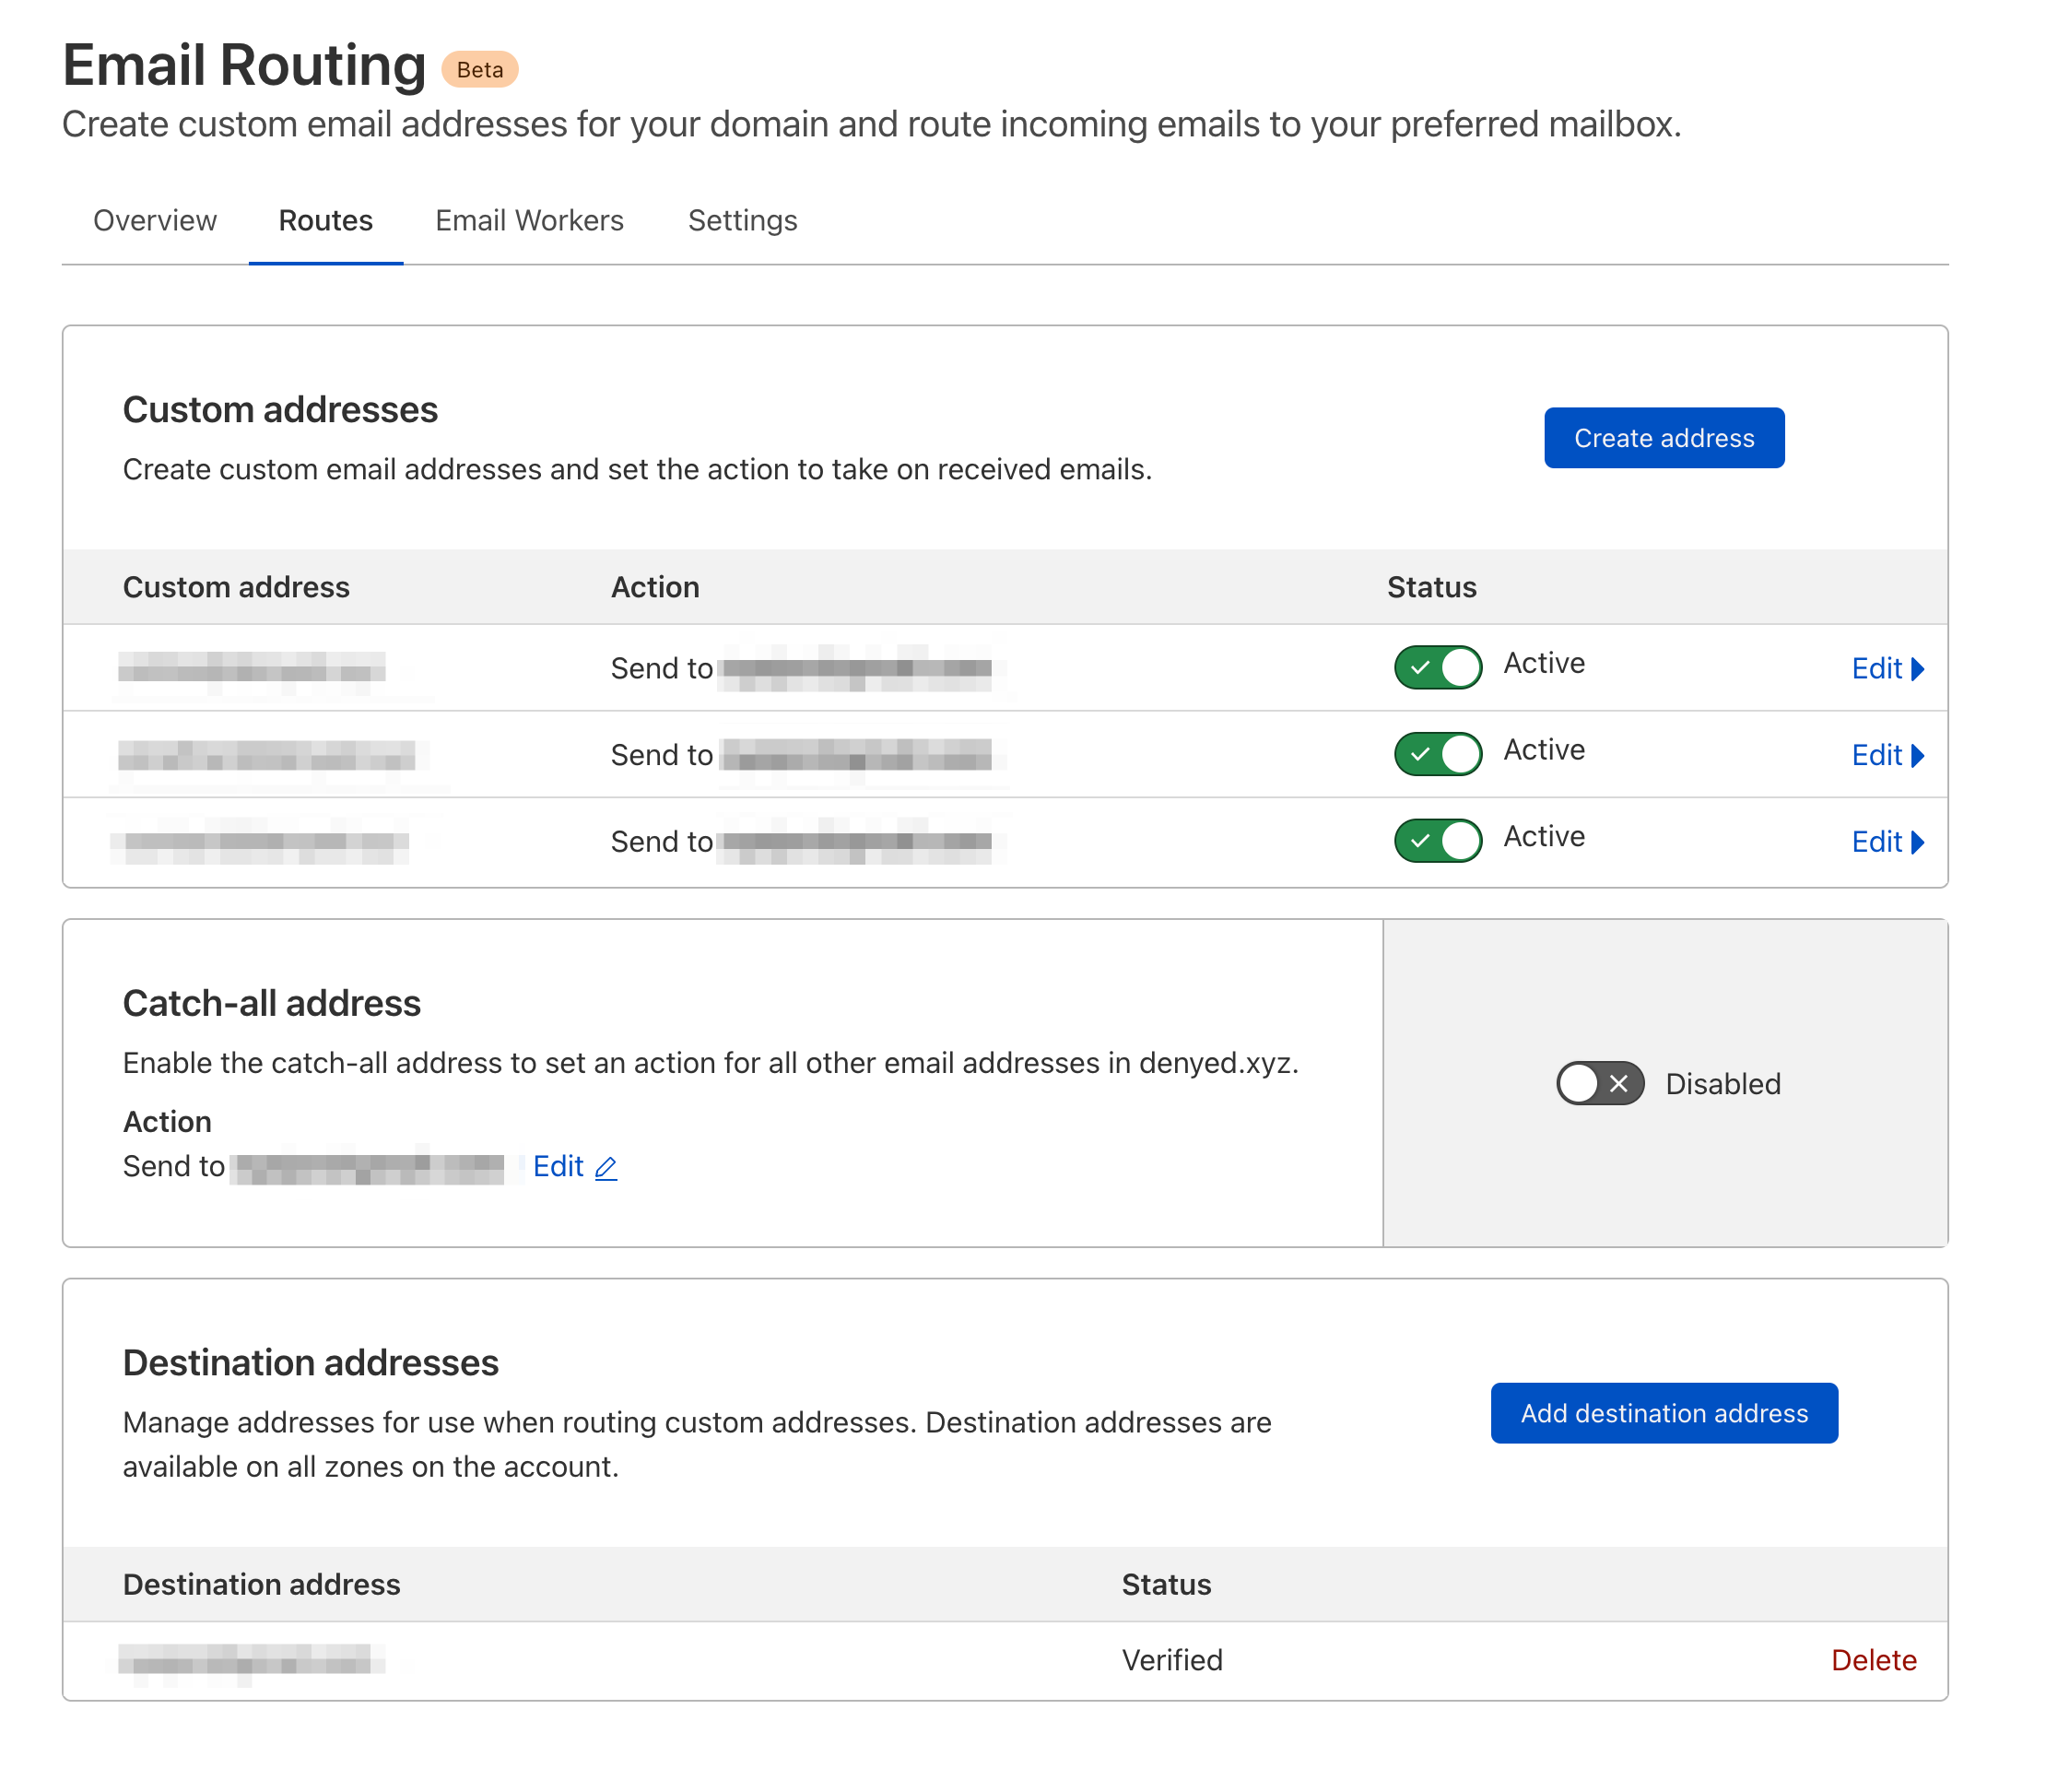
- You can either use a catch-all which forwards every email sent to your domain, or only forward specific email addresses.
In the end, you should have something that looks similar to this:
Enable email sending
Now that you can receive emails on your domain, it's time to enable sending email.
This part will be done within your SMTP provider and Gmail (or another email provider of your choice). What we want to achieve is being able to send emails, and maximise the probability of them being delivered to the expected recipient.
You need to have decided on a service that allows you to send emails. As previously mentioned, I use Brevo.
SMTP service setup
The first step is to set up the SMTP service to allow it to send emails on your behalf. On Brevo, the steps required look something like this:
- Authorize/validate your domain under Senders and IPs by adding all the records from the email sender to your Cloudflare DNS page.
- Configure SPF, DMARC and DKIM
Brevo will automatically setup DMARC and DKIM, but you may need to manually set up SPF and adjust the strictness of the email delivery.
Ultimately we want our DMARC management page in Cloudflare to look something like this:

SPF
The Sender Policy Framework (or SPF) allows you to specify all IP addresses and hostnames that are permitted to send email on behalf of your domain. If you don't configure SPF on your domain your email may be blocked or marked as spam by email receivers.
For this to work, we need to add both Cloudflare and Brevo to the SPF record:
"v=spf1 include:_spf.mx.cloudflare.net include:spf.brevo.com mx -all"
This new SPF record now replaces the old record. It allows both Cloudflare and Brevo to send emails using your domain name, while all other senders are blocked using -all.
The options for controlling the strictness of the SPF record include:
+all- will allow all emails to be received even if not sent by a trusted sender.~all- will soft fail, so emails will be marked as spam if a trusted sender does not send them.-all- will reject all emails not sent by a trusted sender.
DMARC
Domain-based Message Authentication Reporting and Conformance (or DMARC) tells an email receiver how to treat incoming emails from your domain that fail email security checks. You can also specify a reporting email address to receive regular reports about outgoing emails on your domain.
We want to specify that we want to reject all email that fails the DMARC authentication checks.
Create a TXT record in the DNS of your domain with the following value replacing the rua: mailto with the settings for your domain:
Record type: TXT
Name: _dmarc
Value: "v=DMARC1; p=reject; rua=mailto:<somehash>@dmarc-reports.cloudflare.net,mailto:[email protected]"
The p=reject means that emails will be dropped if they do not include the DKIM and SPF as configured for your domain.
DKIM
DomainKeys Identified Mail (or DKIM) adds a public key to your DNS for email receivers to verify your outgoing signed email.
Brevo and Cloudflare will automatically create this.
Gmail setup
Now, it's finally time to configure your Gmail inbox to be able to send and receive your emails from your domain account.
- Open Gmail settings and go to the Accounts and Import page.
- Click Add another email address.
- In the popup window, leave treat as Alias enabled and enter your custom email address that you wish to send from.
- In the SMTP page, fill in the SMTP settings from the SMTP provider you set up earlier.
- Validate the email address. This allows you to test that everything is working.
- Optional: Set this as your default email address in Gmail.
You can send and receive from as many email addresses as you like on your own domain.
Prevent your custom domain email from being detected as spam
If you followed the instructions above, most of these steps should already be completed. In case you are having trouble, double-check that all these records exist:
- Have an MX record for your domain, so you're able to accept responses.
- Check the SPF, DMARC and DKIM record for your domain.
- Check to see if your sending IP address is on any blacklists. Get it off if you can.
Custom domains are often flagged by the spam filters on many email services so it might take a bit of time for your domain to become trusted if you recently registered it.
Conclusion
Congrats, you should be able to send and receive your email on your custom domain. Completely for free!
Thanks for reading, and let me know if you encountered any issues.